L. Cornelissen & Son

While in London I couldn't not stop by the British Museum. I had never been and was surprised to see some old friends, namely sculptures that I had drawn from casts of for years in art school at MICA. Walking through the galleries, it is hard to forget that this was once the center of a global empire. What an incredible collection! I will have to schedule more time to do a proper tromp through on a later trip. 

Once the museum tiredness had thoroughly set in (not even other museum employees are immune to the museum sleepys) I started walking back to the tube stop when something caught my eye in a shop window. It turned out to be L. Cornelissen & Son, an 19th century art supply store. 

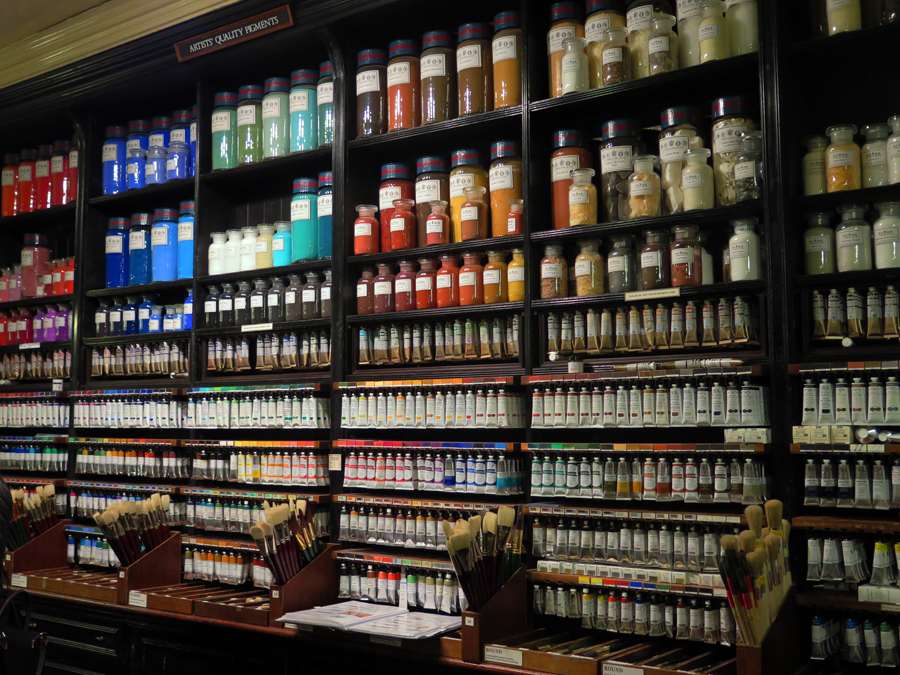
This was the closest thing to a geniune Harry Potter experience I had during a week in London. Immediately upon entering the shop the warm embrace of old wood made the January chill and the hustle and bustle of the city street quickly fade away. The central wall was a wunderkammer of paint, with huge glass containers of every pigment you could imagine with hand written labels cascading down into what looked to be hundreds of colors of paint neatly color coded and hanging on custom racks. 

The best history of the store that I found was from the National Portrait Gallery (London). The shop was opened in 1855 by a Belgian lithographer (too perfect!) named Louis Cornelissen (1861-1883). Suprisingly the shop moved a number of times but remained in the family until 1977 when the last remaining descendent, Len Cornelissen, died. It reopened 2 years later and moved to its current location, which looks like it has been there for more like 300 years rather than a little over 30. 

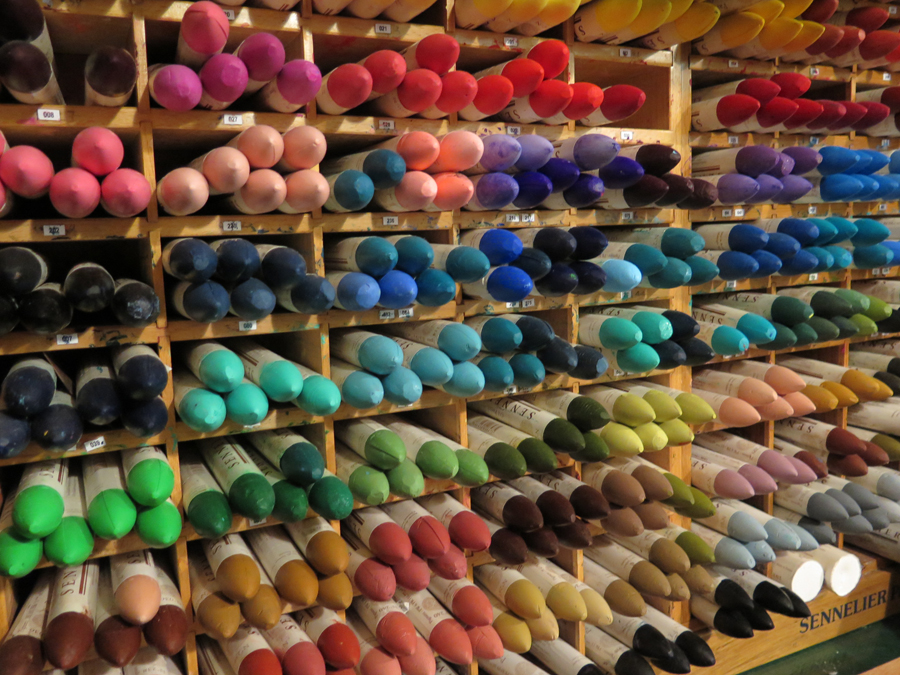
Moving through the small store took so much longer than I imagined, every inch was neatly filled with some amazing display of materials. Many artists, myself and Lili very much included, love the tools and materials we use so much that we are totally satisfied just looking at the raw ingredients, many times feeling like they are too perfect to risk messing up by using. This shop is the physical embodiment of that idea! I just wanted to soak in all the incredible colors and textures, like this array of super chunky oil pastels. 

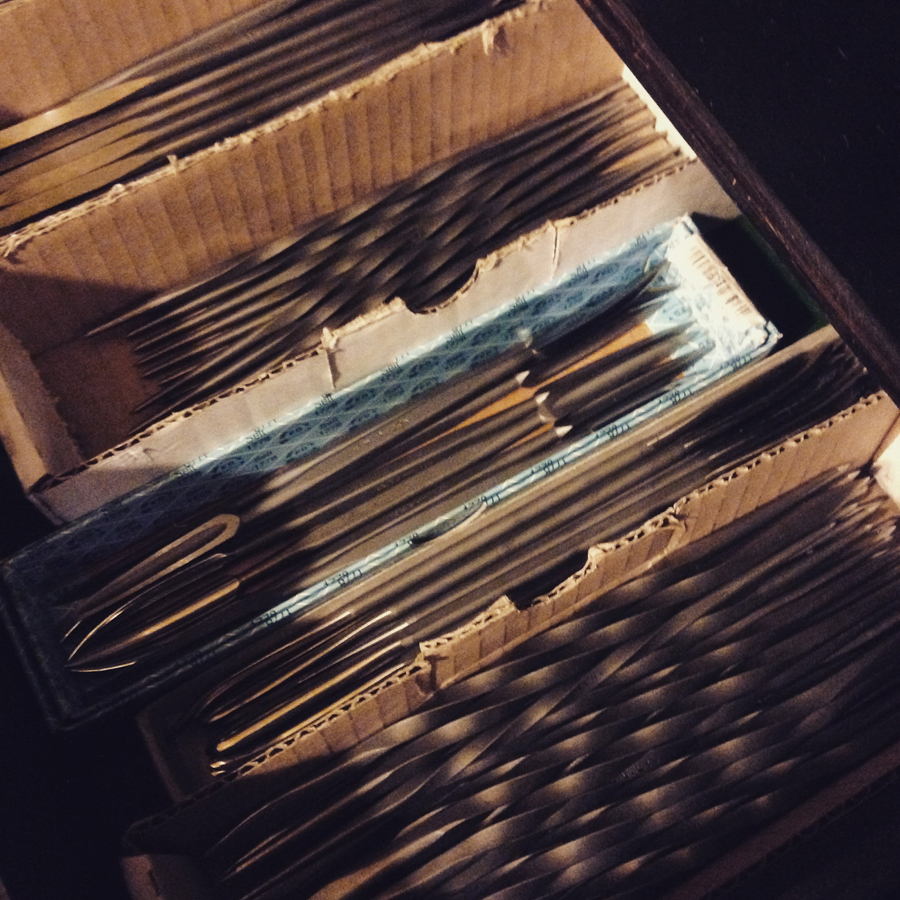
I almost missed the part of the store that I ended up spending the most time in, the printmaking tool drawers. It was so great to learn that the shop was started by a lithographer and glad that printmaking was still solidly represented. It isn't often that you find a store that stocks many printmaking materials beyond the basic speedball products. Not only did they have professional offerings, they had the largest assortment of tools that I've ever seen in real life, and even plates of different materials below the display to test them out. I showed serious restrain and only left with a cute little ball burnisher. 

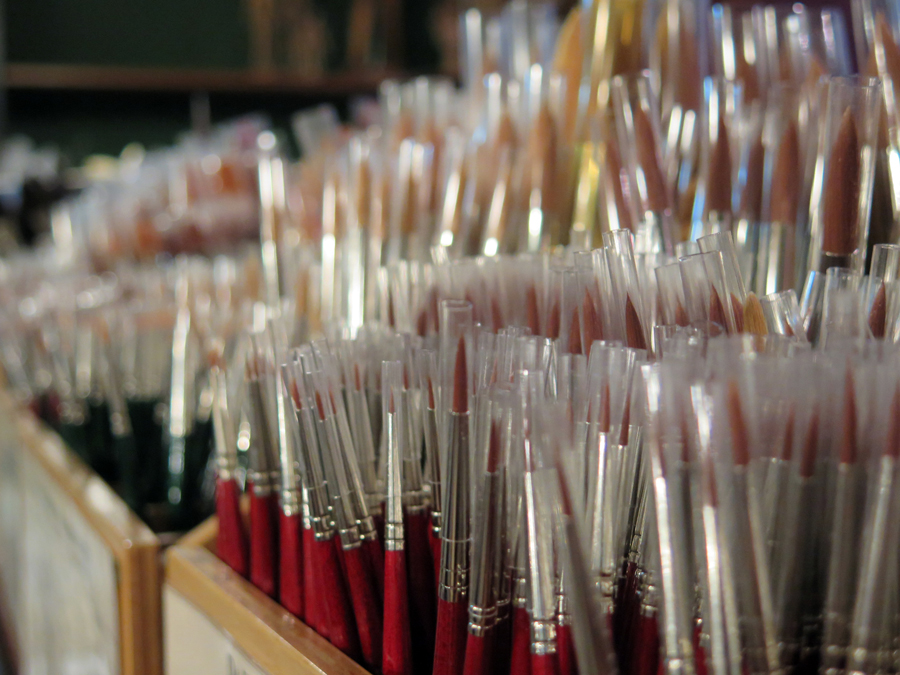
After that discovery I didn't leave a drawer unopened and realized that behind the counter was an entire wall of drawers, and based on the tableaus, they housed all sorts of specialty brushes. Now if that's not an artist's Ollivanders, I don't know what is! This will definitely go on the must-see list for every future trip. 

L. Cornelissen & Son
105A Great Russell Street, London WC1B, United Kingdom
www.cornelissen.com
+44 20 7636 1045

Plant Spotlight: Dracena Lemon Surprise

Botanical Name: DRACAENA deremerisis
Common Name: Dracena 'Lemon Surprise' 

Light Requirements: Partial to full sun, grows best in bright but indirect light. Will tolerate low light, but growth will be much slower.
Water Requirements: Allow soil to dry between waterings. Plant likes high humidity, place pebbles and water in a tray below the pot.
Size: Grows to 2' as a potted plant

On today's plant spotlight we have another one that is close to indestructible. It can take varying light conditions and will be ok if you forget a watering every once in a while.

We picked this up on a trip to Logee's, which is a completely magical place. We definitely recommend a visit if you are anywhere near Danielson, CT and are plant lovers--or even plant likers. The overgrown greenhouses are a sight to be seen!

Dracaena are popular house plants because of their exciting and colorful foliage. In particular, the Lemon Surprise has lime green leaves, with a dark green stripe in the center of the leaf, bordered by thin white lines. Plus, the leaves curl, adding a lot of volume and visual interest to this plant, a little reminiscent of Dr. Seuss truffula tree!

One drawback is that the Dracaena is hardy to zone 10, so if you keep your house cold in the winter (below 60°) this one won't be a good choice for you.

The color and texture of this plant is amazing, and it has stood up to less than ideal treatment, definitely a good plant for beginners.

Interested? You can buy this plant here from Logee's, where our plant and information came from.

Read our other Plant Spotlights:
Mason's Congo


Keep up with us and see behind the scenes on FacebookInstagram, and Twitter!

A Banner For Margo

web_whole banner blue door angle from left.jpg
web_bird close up right side.jpg

One of my great friends from college just had a baby! Yay! She lives far away and I wanted to send her something special, since I can't descend upon her and give her and her baby in-person love. I decided to make a banner using blackbirds, an image that she uses in her own work, and also used my embroidery skills that have been closeted for far too long.

It felt pretty good to get the box of embroidery floss out and flex my stitching muscles. I used a big variety of stitches on the banner and I'm going to show you how to do one of my favorites, the Japanese Darning stitch. That's the stitch I used  in that background of the sash that the birds are holding.

The history of darning, repairing or reinforcing worn or damaged fabric, is widespread and was a normal practice before buying new clothes was as easy as buying groceries in the grocery store down the street. Different cultures took on different styles, one of the more decorative and better known styles is sashiko from Japan. I did some quick research to see what the history of this particular stitch is and couldn't find anything specific. Based on the generalized name, my best guess is that the "Japanese Darning Stitch" is a westernized simplification of those Sashiko techniques or a style related to them.

History aside, I chose to share this stitch because of the texture it provides, and the neat detailed shapes, plus the infrequency of use; I don't see it very often. Like Maria Von Trapp says "Let's start at the very beginning," with the basic darning stitch.

The Darning Stitch

I used different colors to help differentiate rows and steps, hopefully easier for you to visualize. All of these pictures can be clicked on so you can get a closer look.

Start your needle with a knotted thread at the back of your fabric

Bring it through to the front. Use the needle to pick up a few threads, bring the needle across the fabric, now pick up a few more threads, and pull the thread all the way through; repeat until the end of your row. The difference between the darning stitch and the running stitch is the darning stitches are long with small smaller spaces in between and a running stitch has even stitches and spaces.

The next row is going to be off center from the first, meaning the new stitch will be centered over the previous row's space, and this row's space is centered over the last row's stitch.

Here is a picture with lines drawn over the stitches, showing you how the stitches and spaces are aligned. Again, you can click on this to make it bigger.

Fill in your shape with the darning stitch.

Now we'll add in the next steps to make it a Japanese Darning stitch...

Japanese Darning Stitch

Pull the thread through at the right side of a stitch (purple row). In the row above (orange), insert the needle in one side of the space where the thread goes behind the fabric, bring the needle back to the front of the fabric at the same place as the row's stitch comes forward.  Pictures are below each instruction.

Bring the thread to the first row (purple), thread it through the space where the original row (purple) goes behind the fabric.

Back to the orange row, follow the orange thread behind the fabric and back out again. Repeat these steps to the end of the row.

Once you finish the row, bring the thread the left of an orange stitch, go the the next row (purple) and do the same steps in reverse. Follow the purple thread behind and then in front of the fabric.

Now, back down to the orange row, bring the thread behind the fabric with the orange thread, and then back to the front. Now you'll start to see the hourglass shapes form.

Continue across the row, proceed to the next row and finish filling in your shape.


That is the basic structure for the Japanese Darning stitch. If your stitch ends at a funny spot on the edge, just fill in the missing spaces with single stitches.

Here is the stitch completed over an area in the three color version, and then the single color for comparison.

Do you think you can use this stitch in your own work? I love the look when you fill in large spaces with it. You can even use it as a base and then work on top. Now get stitchin'!

Things we used in this project: